Sunday, February 21, 2016

BSidesPR 2016 Badge programming tools


Now lets talk about how to code for the BSidesPR 2016 badge. If you do not know what this is all about refer to last post about an overview of the board here.

If you do not want to read, what you need?
  1. Keil (for windows)
    1. ARM Compiler, compatible with a lot of ARM MCUs
    2. Supports debug (to debug requires an external programmer debugger ST-Link)
  2. STM32CubeMX
    1. Code generator, helps creating Keil project and configuring MCU pins
    2. Compatible with Windows and Linux
  3. System Workbench for STM32 ( Linux)
    1. ARM Compiler compatible with Linux
    2. Free but need to register
    3. I downloaded but have not tested
  4. stm32flash to download binaries to board in linux
    1. clone and build tool from https://github.com/aguegu/stm32flash
    2. Use with -s to download
    3. ./stm32flash -s /dev/ttyUSB0 (should recognize device)

The badge has a STM3230F4P6 micro controller. It has a Arm Cortex M0 cpu, so standard coding tools used for arm chips should work with this board. I am far from an expert here and I was able to create some simple codes and download to it.
This chip is cross platform, but by the time I write this I haven't played with it in other than windows so that is what this post is all about.

I have used Keil to program for this badge from Windows it can be freely downloaded. For what I know Keil runs only on windows. It is basically an IDE like visual studio to code for Arm micro controllers. There are other compilers that should be compatible with the micro controller but as of this post I have not tested them.

You can do all with Keil alone, however I like to get a little help setting up the project so I use STM32CubeMX. The STM32CubeMX is a code generator, it help you get started on creating a project and configuring different ports of the STM32 chip as input, output or any other feature available. It is a wizard like interaction and it can produce a project file that you can open with Keil and compile.

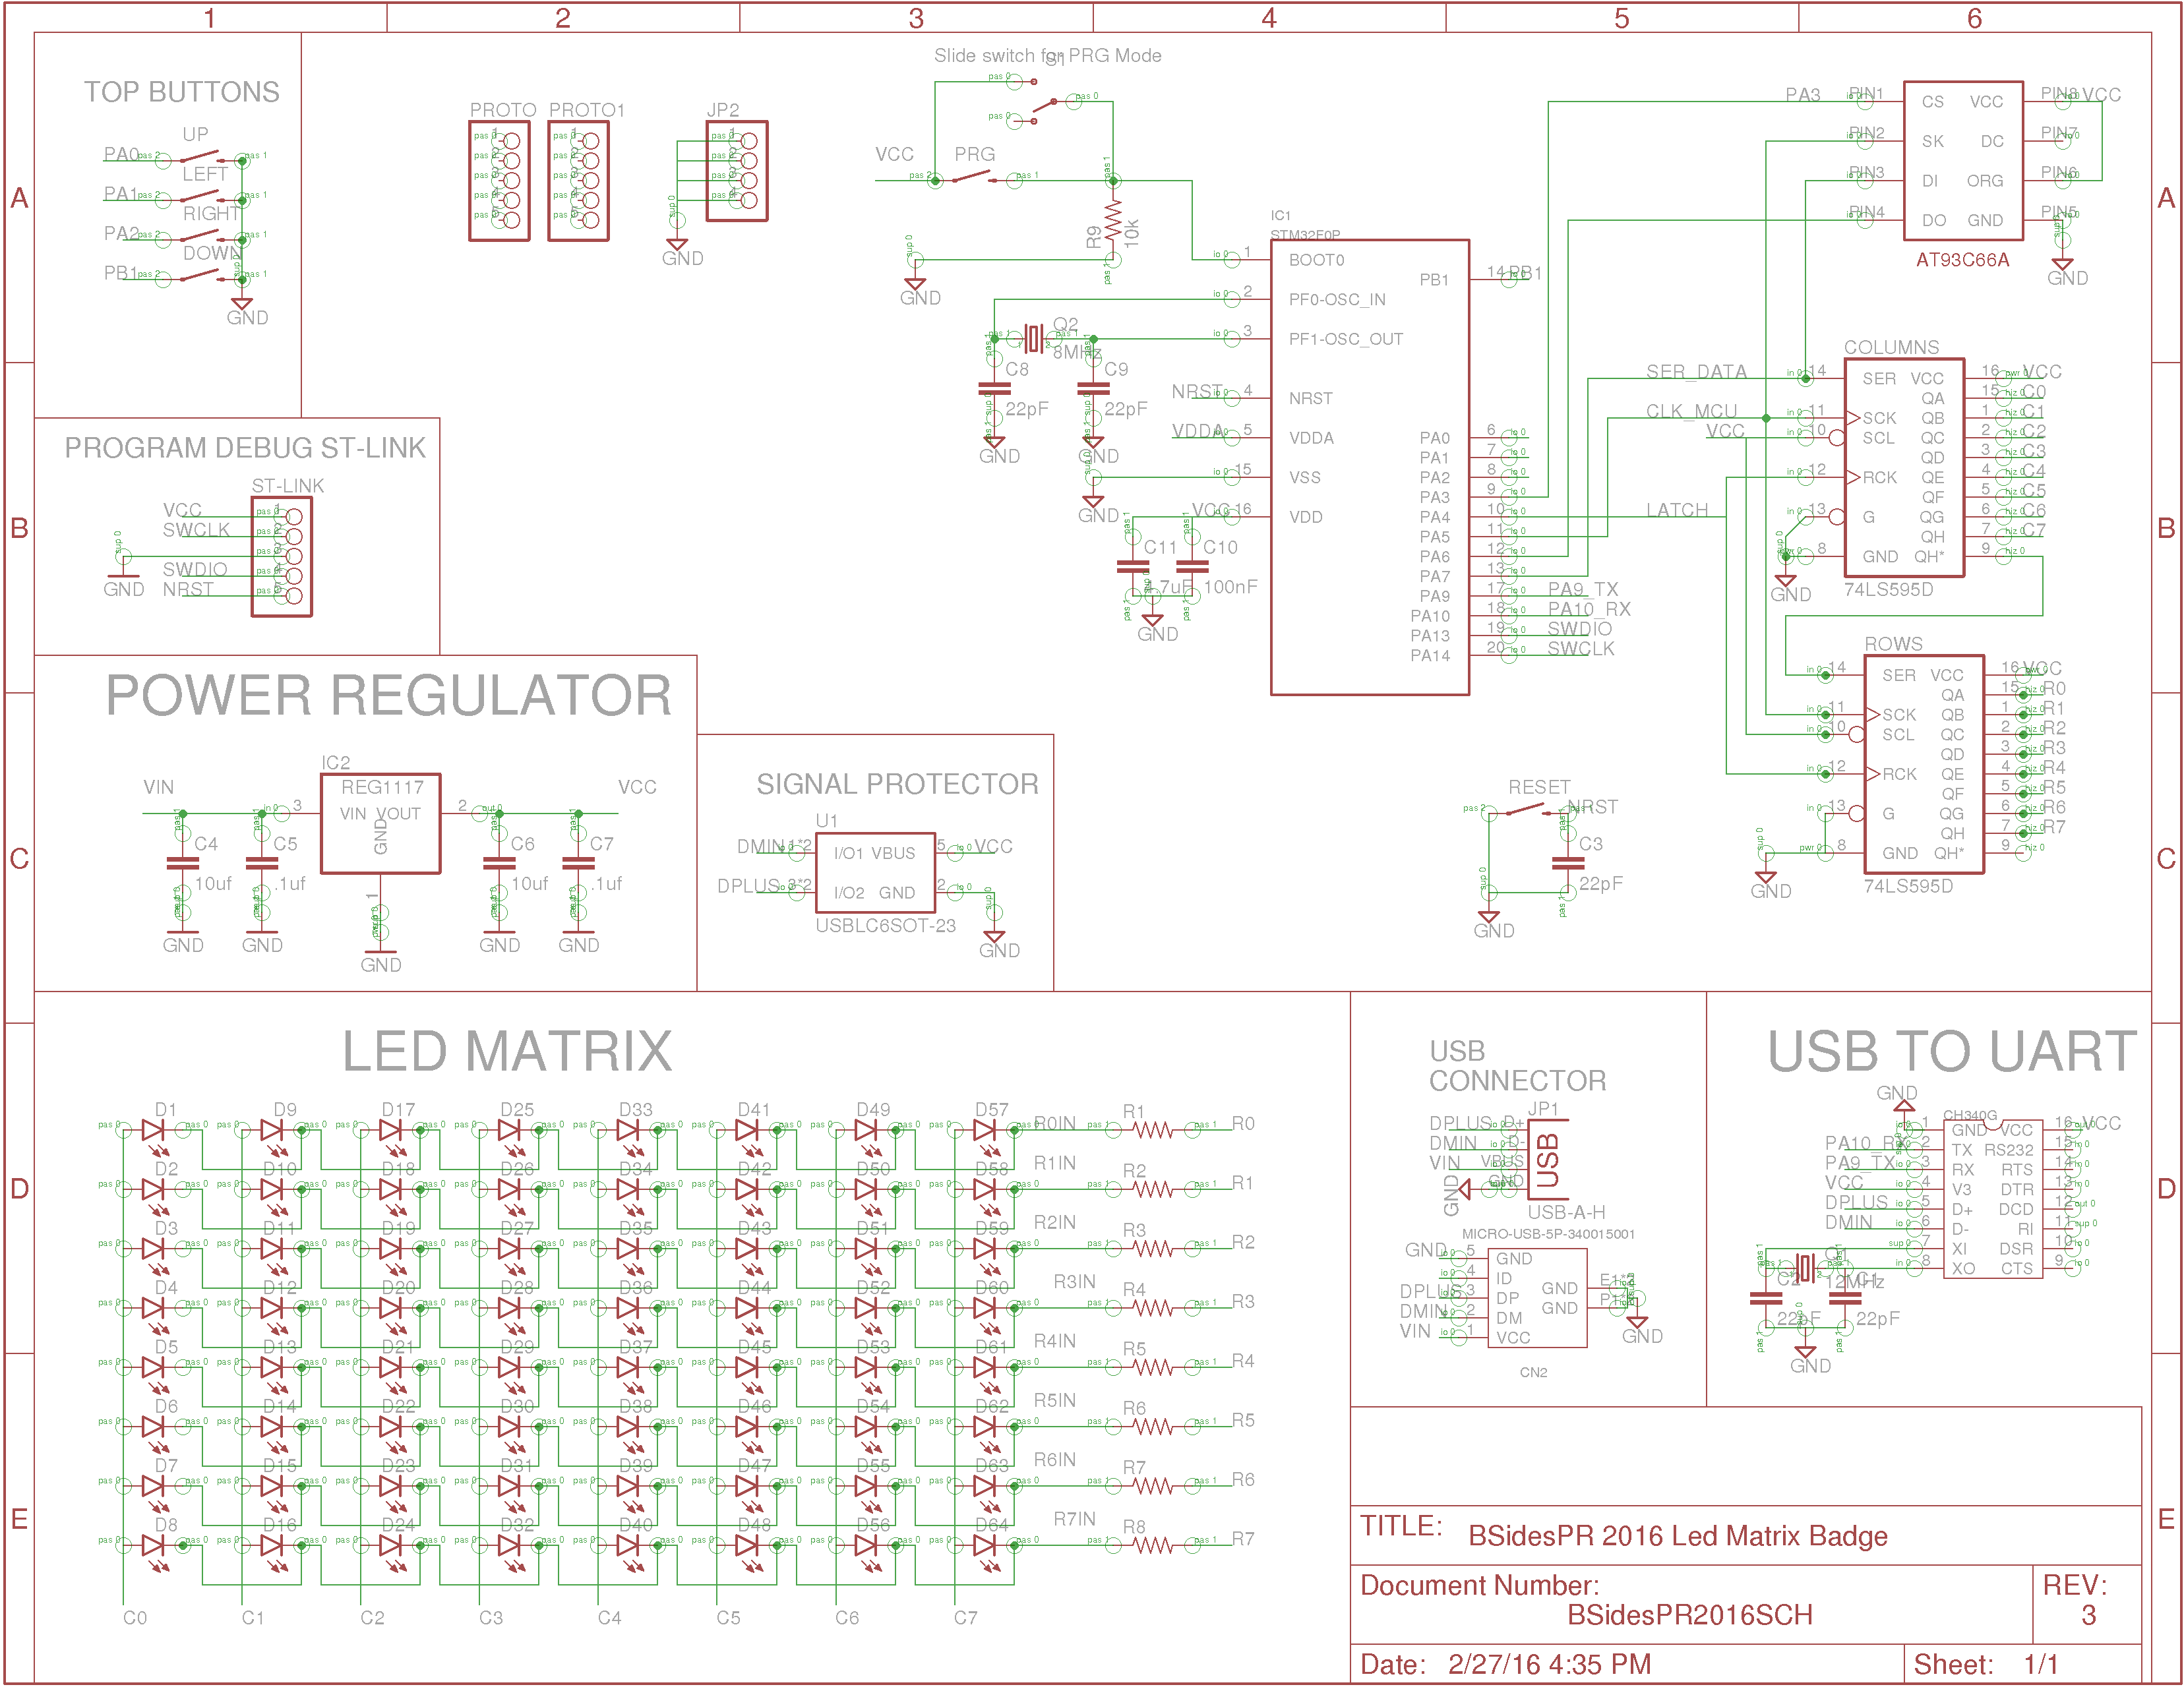
Badge hardware circuit diagram (Please note that the prototypes use 5VDC regulators not 3.3V)

To use Serial data communication from code, it is required to configure the corresponding pins to be TX and RX. Also to use the LED matrix corresponding pins should be configured as well. Here is a simple configuration on how to just make it work, configured via STM32CubeMX.


LED matrix can be used bu configuring PA7, PA5 as SPI and should provide a better performance that just using them as standard outputs, however this way also works.



Saturday, February 20, 2016

BSidesPR 2016 Badge prototype

Last year (2015) BSides PR badge was cool but time pass and we need to keep on improving. This year badge is little different. As of when this post is published we only have a prototype, final version can and will change a bit. However key aspects of the board will stay the same. Design files for the board can be found at github.

Lets divide the badge in three areas. The brain, the communication and peripherals.

The Brain:
This badge carries some cool stuff. We went with a STM32F030F4P6 micro controller. This is an ARM® 32 bit Cortext M0 micro controller made by ST and consists of 16Kb of flash memory and it is clocked at 48Mhz. Information and manual can be found at manufacturer web site. It has 1 UART (in use to communicate with pc), 1 I2C and 1 SPI port. SPI port is used for shift registers.


Communication:
The badge can comunicate with the pc via USB. For this it uses a CH340G usb to serial chip. I have been using this chip for so long that I do not remember if linux needs any special driver. But for windows it indeed needs a driver. The chip works with Linux, Windows and MAC after is corresponding driver installation.
For drivers

    • Chinese official web site link
    • Some guy blogpost (has something for MAC, but I have never tried it)
    • Or just go to google and search for CH340G driver


Peripherals:
This baby is packing a few things.

  1. LED matrix
    • 8x8 LED matrix that is controlled from two 595 shift registers
    • One shift register is used for the rows and one for the columns
  2. Buttons
    • In the front it consists of four push buttons
    • The prototype do no have any of these buttons wired up to the microcontroller. Instead pins for the buttons are exposed at JP4 port. Pins are labeled Left, Right, Up and Down.
    • On the back there are two more buttons. One for programming and the other for reset.
  3. I/O exposed pins
    • To the left of the microcontroller a few pins are exposed. Please note the one that says 3.3V it is actually 5V. There pins PA0, PA1, PA2, PA3, PA6 and PB1 are available to be used. Easily can jump wire one of those pins to the buttons to interact with them.
    • On the right (beneath PROTOTYPE) is a ST-LINK port. It can be used for debugging with an external programmer. This is not required for normal programming but if you'll like to see a break point in your code this is the way to go and an external programmer is required. An external programmer can be a cheap ST-Link V2 programmer/debugger and are cheap on ebay.